
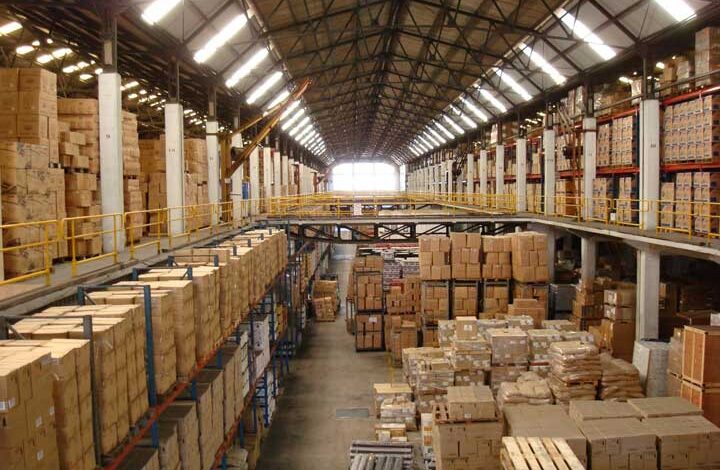
Warehouse space is expensive. Whether you’re paying rent by the square foot or you own the building, every inch of vertical real estate matters. Yet many warehouse managers leave significant capacity untapped, cramming inventory inefficiently or accepting that their current layout is just “how it is.”
The truth is simpler. With the right approach to warehouse racks and storage configuration, you can often gain 20 to 40 percent more usable capacity without moving to a larger facility or investing in expensive expansion. The key is systematic optimization, not guesswork.
If you’re working with older shelving systems, mismatched racking heights, or a floor plan that was never properly designed for your actual inventory mix, you’re likely wasting space. The good news? Most of these problems are fixable, and many solutions won’t break your budget.
Let’s walk through a practical, step-by-step approach to maximize your warehouse space and get more from what you already have.
Step 1: Conduct a Honest Inventory Audit
Before you move a single rack or add new shelving, you need to understand what you’re actually storing.
Walk your warehouse with a clipboard or a simple spreadsheet. Don’t just guess at what’s there. Document:
- What products or materials occupy each zone
- How much physical space each product category takes up
- How fast inventory moves in and out (velocity)
- What’s stored inefficiently or taking up disproportionate floor space
- Which items sit dormant for months
Many warehouse managers are surprised by what they find. It’s common to discover that 10 to 15 percent of floor space is occupied by slow-moving or obsolete inventory that could be relocated, returned, or liquidated.
You’ll also spot items stored at ground level that could be stacked higher, or tall products using up valuable vertical space when they could be consolidated to one dedicated zone.
This audit serves as your baseline. Without it, any optimization effort is just rearranging the deck chairs.
Step 2: Measure Vertical Capacity Ruthlessly
This is where many warehouses leave money on the table.
Most facilities don’t fully utilize their ceiling height. If your building is 20 feet tall but your racking only goes up 10 feet, you’re using half your space. The goal is to maximize vertical density while respecting safety limits, load ratings, and picking accessibility.
Measure your building’s clear ceiling height, accounting for:
- HVAC ducts or piping that intrude into the space
- Sprinkler systems or fire safety equipment
- Any structural beams or low-hanging obstacles
- Required clearance for forklift operation (typically 12 to 18 inches above the highest load)
Compare that measurement to your current racking height. If there’s a five-foot or greater gap, you have an optimization opportunity.
Taller racking systems can be added, or your existing system can be upgraded if it’s older equipment. The return on investment for vertical expansion is often compelling because you’re using space you already own but aren’t leveraging.
Step 3: Evaluate Your Racking Type and Configuration
Not all racking systems are equal. Different products and workflows demand different solutions.
Selective pallet racking (the most common type) allows direct access to each pallet but uses more floor space per unit stored. Cantilever racking is ideal for long or bulky items. Drive-in or drive-through systems maximize density for slow-moving inventory.
Ask yourself:
- Is your current racking type well-suited to your actual inventory mix?
- Are you paying for features you don’t need (like direct access to every pallet)?
- Could you use a hybrid approach, mixing racking types for different zones?
For example, a manufacturer with high-velocity production materials might use selective racking in one section for fast picking, but drive-in racking in another section for bulk raw materials that rarely need individual retrieval.
Switching or adding complementary racking types isn’t always cheap, but it can unlock significant capacity gains. Sometimes the best space optimization isn’t adding height or depth, but using the right system for each storage category.
Step 4: Optimize Aisle Width and Layout
Wide aisles feel safe and easy to navigate, but they’re also a silent space killer.
Industry standards call for specific aisle widths based on equipment. A standard forklift requires about 11 feet of aisle width for 90-degree turns. Narrower aisles mean more racking, but they also reduce efficiency and safety.
The optimization is finding the sweet spot: aisles wide enough for safe, efficient operation but not so wide that you’re wasting precious floor space.
Review your current aisle configuration:
- Are aisles uniform throughout, or do some areas have unnecessary extra width?
- Could you create dedicated “narrow aisles” for manual picking and keep main aisles standard width?
- Is your aisle layout aligned with your actual traffic flow, or are you moving product through inefficient paths?
Some warehouses benefit from diagonal aisles or angled racking to improve sightlines and reduce travel time. Others find that simply repositioning racking runs could save 10 to 15 percent of floor space.
Step 5: Right-Size Your Inventory Positioning
Where you store items matters as much as how you store them.
Fast-moving inventory should be positioned at ergonomic heights (roughly waist to shoulder level) and close to packing or shipping areas. Slow-moving items can be stored higher or in less accessible locations. Very slow or seasonal inventory might be moved to overflow storage or a secondary location entirely.
This principle, often called “velocity-based positioning” or “ABC analysis,” is simple but powerful. When implemented correctly, it:
- Reduces picking times and labor costs
- Minimizes product damage from excessive handling
- Increases safety by reducing awkward reaches and climbs
- Frees up premium floor space for more active inventory
Walk your warehouse and honestly assess whether high-velocity items are in premium locations. You might find that popular products are buried in inconvenient spots while slow movers occupy easily accessible space.
Repositioning alone, without adding a single rack, can create measurable efficiency gains.
Step 6: Eliminate Dead Zones and Wasted Space
Every warehouse has them: odd corners, spaces under staircases, the area behind the bathroom, nooks created by irregular building shapes.
While you can’t stuff every corner with racking, you can often capture 3 to 5 percent of additional capacity by addressing dead zones thoughtfully.
Walk your facility and list spaces that are currently unused or underutilized:
- Corners or angles that could hold a small racking unit
- Vertical wall space suitable for narrow shelving
- Overhead space above dock areas or office zones
- Floor space currently used for equipment that could be repositioned or mounted
Not every dead zone is worth reclaiming. But collectively, they often add up to real square footage, especially in smaller to mid-sized warehouses.
Step 7: Consider Used or Flexible Racking Solutions
Not every optimization requires brand-new equipment.
Used pallet racks and industrial shelving are often available at a fraction of new prices, especially if you’re adding to an existing system. Quality used equipment, when properly inspected for safety and load ratings, can deliver the same capacity gains at significantly lower cost.
Flexible or modular racking systems allow you to add, remove, or reconfigure bays without replacing your entire system. This matters if your inventory mix changes seasonally or if you’re unsure about committing to a permanent configuration.
Some warehouses also benefit from temporary racking solutions for peak seasons, allowing them to add capacity without permanent investment.
Step 8: Document and Implement Your Plan
The checklist only works if you actually use it.
Create a simple spreadsheet or document that captures:
- Current space utilization percentage
- Identified opportunities and estimated gains
- Priority ranking (high impact, low cost first)
- Responsible party and timeline for each optimization
- Expected ROI or space gain for each initiative
Start with the highest-priority, lowest-cost changes. Quick wins build momentum and often fund larger investments.
For example, you might start by eliminating dead zones (quick and cheap) before investing in taller racking or reconfiguring major zones.
The Real Impact
A warehouse that goes through this systematic optimization process typically finds 15 to 30 percent capacity improvements. For a facility paying $10 to $20 per square foot annually, that could translate to $20,000 to $50,000 in recovered capacity value.
Even more important: optimized spaces run more efficiently. Picking is faster, errors are fewer, and safety improves. Those operational gains often matter more than the raw square footage recovered.
The investment in a few hours of measurement, analysis, and planning typically pays for itself many times over.
Getting Help When You Need It
If your current racking system is old, mismatched, or poorly configured, bringing in a professional eye can accelerate the process. Experienced warehouse specialists can quickly identify optimization opportunities that might take you weeks to spot alone.
Similarly, if your optimization plan requires new or additional racking, working with a supplier who understands your specific constraints and goals ensures you’re making decisions based on your actual operation, not generic best practices.
The goal isn’t perfection. It’s taking a systematic approach to capturing the capacity you already own but aren’t fully utilizing. That’s where the real ROI lives.


